Table of Contents
Since the late 1950s and early 1960s, the positive staining approach has been employed to increase the contrast of biological materials (tissues and cell structures, viruses, etc.). The samples are treated in heavy metal salt solutions that react with cellular structures using this technique and negative staining. Uranyl acetate and lead citrate are the most often utilised salts in modern society. Grids containing ultrathin sections of a sample are incubated in uranyl acetate for 15 minutes; this operation should be performed in a dark setting. The grids are then rinsed in distilled water and incubated in lead citrate for four to five minutes in a CO2-free atmosphere. Tablets of NaOH are used to prevent the environment from interacting with CO2. At the conclusion of the operation, the grids are rinsed with distilled water, air-dried, and examined using a transmission electron microscope (TEM).
What is positive staining of Virus?
Positive staining of a virus refers to a laboratory technique used to identify the presence of viruses in a sample. It is based on the principle of staining, which involves the use of a colored dye to make the virus particles visible under a microscope. The term “positive staining” refers to the fact that the virus particles take up the stain and are therefore visible as stained structures within the sample.
There are several staining methods that can be used to detect viruses, including electron microscopy, immunofluorescence, and immunohistochemistry. In each of these methods, a different type of stain or antibody is used to target specific viral components, such as the viral envelope, capsid, or nucleic acids. The staining can help to identify the type of virus present, as well as provide information about the size and shape of the virus particles.
In summary, positive staining of a virus is a useful tool for diagnosing viral infections and for understanding the structure and characteristics of different types of viruses.
Principle for positive staining of viruses
This technique must be performed in a light-protected area because to its sensitivity to light. Similarly to negative staining, the sample is incubated with a heavy metallic solution that reacts with the organelles and structures of the cell. In positive staining, the most often utilised salts are uranyl acetate and/or lead citrate.
Incorporating ultrathin pieces of the materials into a grid and adding uranyl acetate salt. Washing, which is a crucial step in removing excess salts from the stain, is performed in order to eliminate any remaining salts. Transmission electron microscopy examination of air-dried grids of the material.
Materials and reagents
- 2% Uranyl acetate (0.04 gm uranyl acetate + 2 ml Q-water = 2% uranyl acetate)
- 2-3 pairs of EM grid-grade tweezers
- Ultra-purified water
- Petri plate
- 4ml plastic culture tube with cap
- 4 pieces of 2ml microcentrifuge tubes with screw caps
- stir bar
- stir plate
- 0.02 µm syringe filter and 3-5 ml syringe
- Filter paper (cut into wedges)
- Lab coat, respiratory protection (mask), eye protection
- waste container for uracyl acetate
- Timer
Procedure of Positive Staining of Viruses
Procedure by using uranyl acetate
Transmission Electron Microscopy (TEM) is a widely used tool in various scientific fields for imaging ultra-thin samples in high resolution. A crucial step in preparing a sample for TEM is to stain it with a heavy metal salt to increase its contrast. In this section, we will guide you through the process of preparing 2% uranyl acetate solution, which is commonly used as a stain for biological samples.
Step 1: Preparation of 2% Uranyl Acetate Solution
- Obtain 2ml of ultra-purified water in a 4ml culture tube.
- Add 2% uranyl acetate to the water and stir the sample using a stir bar on a stir plate for 30 minutes to 1 hour.
Step 2: Filtration
- Filter the uranyl acetate solution through a 0.02 µm syringe filter into a 2ml screw-cap tube to remove any undissolved particles.
- Fill the 2ml screw-cap tube with ultra-purified water.
Step 3: Immersion of Grid in Uranyl Acetate Solution
- Immerse the grid in the 25% uranyl acetate solution for 30 seconds.
Step 4: Rinse with Ultra-purified Water
- Immerse the grid in the first tube of ultra-purified water for 10 seconds.
- Immerse the grid in the second tube of ultra-purified water for 10 seconds.
- Immerse the grid in the third tube of ultra-purified water for 10 seconds.
Step 5: Drying the Grid
- Wick off the liquid from the grid using a wedge of filter paper placed at the edge of the grid.
- Place the grid in a grid box and allow it to dry overnight.
Step 6: Observing under Transmission Electron Microscope
- Observe the grid under a Transmission Electron Microscope.
By following these simple steps, you can prepare 2% uranyl acetate solution for TEM imaging. This solution is commonly used to stain biological samples, providing contrast and enabling the visualization of fine details. Remember to handle the solution and the grids with care to ensure the integrity of the samples and to obtain high-quality images.
Procedure by using Uranyl acetate and lead citrate
Step 1: Preparation of Ultra-Thin Sample
- Cut an ultra-thin section of the sample and add it to the grid.
Step 2: Staining with Uranyl Acetate
- Incubate the grid with the sample in uranyl acetate for 15 minutes.
- Wash the grid with ultra-purified water.
Step 3: Staining with Lead Citrate
- Incubate the grid in lead citrate for 4-5 minutes in a CO2-free environment.
- To absorb any CO2 that may react with the salts, place NaOH tablets during the experiment.
Step 4: Drying and Observing
- Airdry the grid and observe it under the Transmission Electron Microscope.
Protective Measures:
- Perform the staining procedure in an environment protected from light.
- Ensure that the environment is free of CO2.
Staining ultra-thin samples with uranyl acetate and lead citrate solutions is an essential step in preparing samples for Transmission Electron Microscopy. By following these best practices, you can ensure that your samples are stained correctly and that you obtain high-quality images. Remember to handle the solutions and grids with care and to work in a protected environment to ensure the integrity of the samples and the accuracy of your results.
Results and interpretation of Positive Staining of Viruses
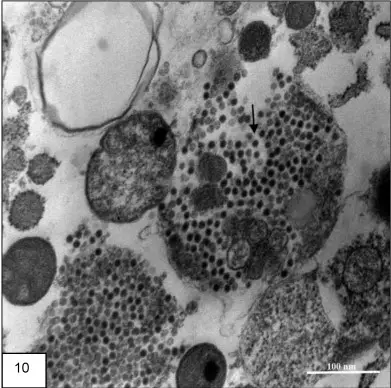
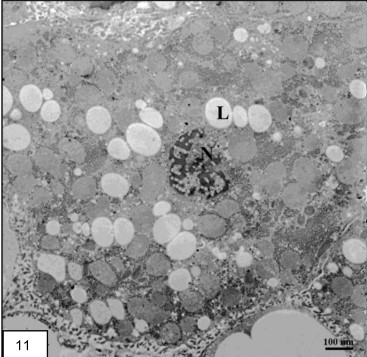
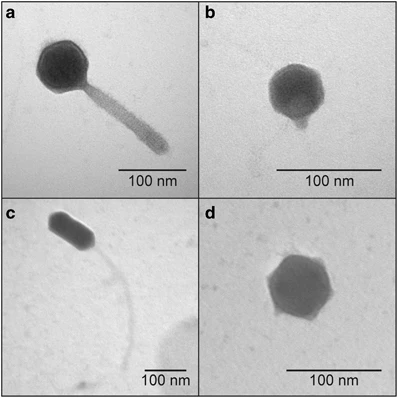
- Positive staining using a Transmission Electron Microscope (TEM) displays a dark image of the virus and a light backdrop, exposing the physical shape of the virus and any structural components such as the virus’s spikes and envelope.
- Using uranyl acetate to examine Hepatitis B antigen, for instance, revealed the widespread distribution of virus particles across the grid.


Applications of Positive Staining of Viruses
Positive staining of viruses has a number of applications in the study of viruses and their biology, including:
- Diagnosis of viral infections: Positive staining can be used to identify the presence of specific viruses in a sample, making it a valuable tool in the diagnosis of viral infections.
- Virology research: Positive staining is commonly used in virology research to study the morphological features of viruses, such as size, shape, and surface structure, as well as their distribution and abundance in a sample. It is utilised to investigate the morphologies and physiologies of viruses. It has been used to identify and distinguish between distinct viruses, such as animal and human viruses.
- Antiviral drug development: Positive staining can be used to assess the efficacy of antiviral drugs by measuring the reduction in the number of virus particles present in a sample after treatment.
- Quality control: Positive staining can be used to monitor the quality of virus preparations, such as vaccine stocks, by assessing the purity and concentration of virus particles.
- Virus quantification: Positive staining can be used to quantify the number of virus particles present in a sample, providing information on the viral load, which is important in the management of viral infections.
In conclusion, positive staining of viruses has a number of applications, including diagnosis of viral infections, virology research, antiviral drug development, quality control, and virus quantification, making it a valuable tool in the study of viruses and their biology.
Advantages of Positive Staining of Viruses
Positive staining of viruses involves the use of a staining agent that binds specifically to the virus particles, resulting in their visual detection and quantification under a microscope. Some of the advantages of positive staining include:
- Increased sensitivity: Positive staining provides a more sensitive method of detecting viruses compared to other techniques, such as negative staining.
- Improved morphology: Positive staining can help highlight the unique morphological features of the virus, making it easier to differentiate between different virus types.
- Quantification: Positive staining can be used to determine the number of virus particles present in a sample, allowing for quantification of the viral load.
- Ease of use: Positive staining is a simple and straightforward technique that can be performed by researchers with minimal training.
- Compatibility with other techniques: Positive staining can be combined with other techniques, such as electron microscopy or flow cytometry, to provide a more complete understanding of the virus and its behavior.
In conclusion, positive staining of viruses provides a number of advantages, including increased sensitivity, improved morphology, quantification, ease of use, and compatibility with other techniques, making it a valuable tool in the study of viruses and their biology.
Disadvantages of Positive Staining of Viruses
Positive staining of viruses, despite its advantages, also has some limitations and drawbacks, including:
- Selectivity: Positive staining agents are specific to a particular type of virus, and may not work well for other types. This can limit the range of viruses that can be studied using positive staining.
- Interference with virus function: Some staining agents can interfere with the function of the virus, leading to artifacts in the observed morphological features.
- Artifacts: Positive staining can result in the creation of artifacts, such as aggregation of virus particles or the formation of background staining, which can make it difficult to interpret the results.
- Cost: Positive staining can be more expensive compared to other techniques, such as negative staining, due to the cost of the staining agents and specialized equipment.
- Time-consuming: Positive staining can be time-consuming, especially when preparing large numbers of samples or when using techniques that require multiple steps.
In conclusion, while positive staining provides a number of advantages, it also has some limitations, including selectivity, interference with virus function, artifacts, cost, and time-consuming procedures. Therefore, it is important to carefully consider the limitations of positive staining when selecting a staining method for the study of viruses.
Precautions
Positive staining of viruses is a sensitive technique that requires careful handling to ensure accurate and reliable results. Some of the precautions that should be taken when performing positive staining include:
- Use of proper safety measures: Positive staining of viruses is typically performed with potentially infectious material, and appropriate safety measures, such as wearing gloves and using a biological safety cabinet, should be taken to minimize the risk of exposure to the virus.
- Proper storage of reagents: The staining agents used in positive staining should be stored in accordance with the manufacturer’s instructions, and should be checked for their expiration date and potency before use.
- Proper sample preparation: Samples should be properly prepared and processed to minimize the potential for contamination and to ensure the preservation of virus particles.
- Proper technique: Positive staining procedures should be performed according to the manufacturer’s instructions and in accordance with established protocols. Any deviations from the protocol should be carefully documented.
- Proper interpretation of results: Positive staining results should be carefully interpreted, taking into account any artifacts that may have been created during the staining procedure.
In conclusion, positive staining of viruses requires careful handling and attention to detail to ensure accurate and reliable results. Adhering to proper safety measures, proper storage of reagents, proper sample preparation, proper technique, and proper interpretation of results are all essential for successful positive staining of viruses.
FAQ
What is positive staining of viruses?
Positive staining of viruses is a method of visually detecting and quantifying virus particles in a sample using a staining agent that specifically binds to the virus.
How does positive staining differ from negative staining?
In positive staining, the staining agent binds specifically to the virus particles, resulting in their visual detection, whereas in negative staining, the background is stained, and the virus particles remain unstained.
What are the advantages of positive staining of viruses?
Positive staining provides increased sensitivity, improved morphology, quantification, ease of use, and compatibility with other techniques.
What are the disadvantages of positive staining of viruses?
Some of the disadvantages of positive staining include selectivity, interference with virus function, artifacts, cost, and time-consuming procedures.
What are some applications of positive staining of viruses?
Positive staining is used in the diagnosis of viral infections, virology research, antiviral drug development, quality control, and virus quantification.
What precautions should be taken when performing positive staining of viruses?
Precautions when performing positive staining include the use of proper safety measures, proper storage of reagents, proper sample preparation, proper technique, and proper interpretation of results.
Is positive staining of viruses a reliable method for detecting viruses?
Yes, positive staining of viruses is a reliable method for detecting viruses, provided that the proper precautions and techniques are used.
Can positive staining be used to identify specific viruses?
Yes, positive staining can be used to identify specific viruses by using staining agents that are specific to a particular type of virus.
Is positive staining of viruses expensive?
Positive staining can be more expensive than other techniques, such as negative staining, due to the cost of the staining agents and specialized equipment.
How long does positive staining of viruses take?
The time required for positive staining of viruses can vary, but it is typically a time-consuming process, especially when preparing large numbers of samples or when using techniques that require multiple steps.
References
- Barth, Ortrud. (2015). Negative and Positive Staining in Transmission Electron Microscopy for Virus Diagnosis. 10.5772/60511.
- De Carlo S, Harris JR. Negative staining and cryo-negative staining of macromolecules and viruses for TEM. Micron. 2011 Feb;42(2):117-31. doi: 10.1016/j.micron.2010.06.003. Epub 2010 Jun 26. PMID: 20634082; PMCID: PMC2978762.
- https://microbenotes.com/positive-staining-of-viruses/
- https://www.ncbi.nlm.nih.gov/pmc/articles/PMC4789507/
- https://en.m.wikipedia.org/wiki/Uranyl_acetate
- https://www.researchgate.net/post/Does_anybody_have_a_protocol_for_uranyl_acetate_staining_of_nanocellulose
- https://greenbioresearch.com/product/2ml-screw-cap-microcentrifuge-tubes-conical-bottom-freezer-micro-tubes/
- https://www.microscopemaster.com/transmission-electron-microscope.html
